Have you ever wanted to decorate your baked goods with something other than the classic frosting swirl? If you have, then you've come to the right place! I am going to make simple, yet elegant buttercream flowers that are sure to elevate your decorating game. Below I will include a list of supplies that you might need for this decorating project!
Supplies:
A decorating surface. I used cupcakes, but you can pipe these on any baked good or object that is easy to hold and move around in one hand.
Buttercream. Any type of buttercream will work, but the flowers will be more defined with a thicker buttercream.
Piping bags. You can either use plastic disposable bags or the reusable ones; either is fine. The amount of bags you will need is going to depend on how many colors you have.
Piping tips and couplers. A coupler is the plastic piece you put at the end of the piping bag that allows you to switch out different piping tips on the same bag. You will need a leaf tip, a petal tip, a small round tip, and a star tip. Here is a guide to help you get familiar with the different piping tips.

Before you begin to create the buttercream flowers, you should organize yourself and set up your work station. This could include your piping surface (I'm using cupcakes), your piping bags with your icing, and a surface to wipe your piping tips off on, since they might get a little messy. The colors I ended up choosing were light pink, dark pink, red, white, green (for the leaves), and yellow (for the center). You can choose more or fewer colors depending on how colorful you would like the flowers.
Basic Rose
To make a basic rose, the first thing you need to do is to pipe a little tower of buttercream in the center of your piping surface. It should be roughly 1/2 in tall. Once you have this, you will grab your petal tip. You should hold the piping bag so that the thin end of the petal tip is facing upright. Make a "C" shape around half of your buttercream tower. Create another "C" on the other side, making sure to overlap them a little bit. This gives a more realistic effect to the petals. Keep going around the flower and making "C" shapes, moving closer to the outside of the flower as you add more petals. You should be rotating your piping surface as you pipe your petals. This makes it easier to get the petal shape you want, and it makes the design more cohesive.


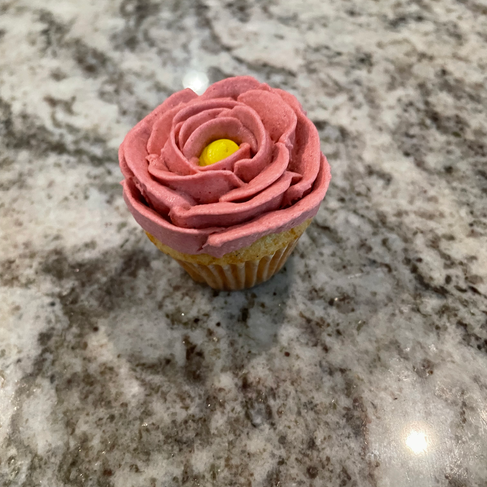
Make sure some petals overlap each other. The bigger the flower gets, the more "C" shapes you can add to one layer (for example, you might be able to pipe 3-4 "C" shapes instead of 2, like at the start).
Leaves

For the leaves, you will use the leaf tip. To make a leaf, place the top of the piping tip very close to the piping surface, but not quite touching. Start piping and move the bag up and down a little bit to give texture to your leaf. Once you have your leaf at the right length, stop putting pressure on the piping bag and pull away. This should leave a nice tip at the end of your leaf.
Tip: You can also use the leaf tip to create flower petals. You use it the same way as you do when making a leaf, but without moving the bag up and down. The bag should stay steady.


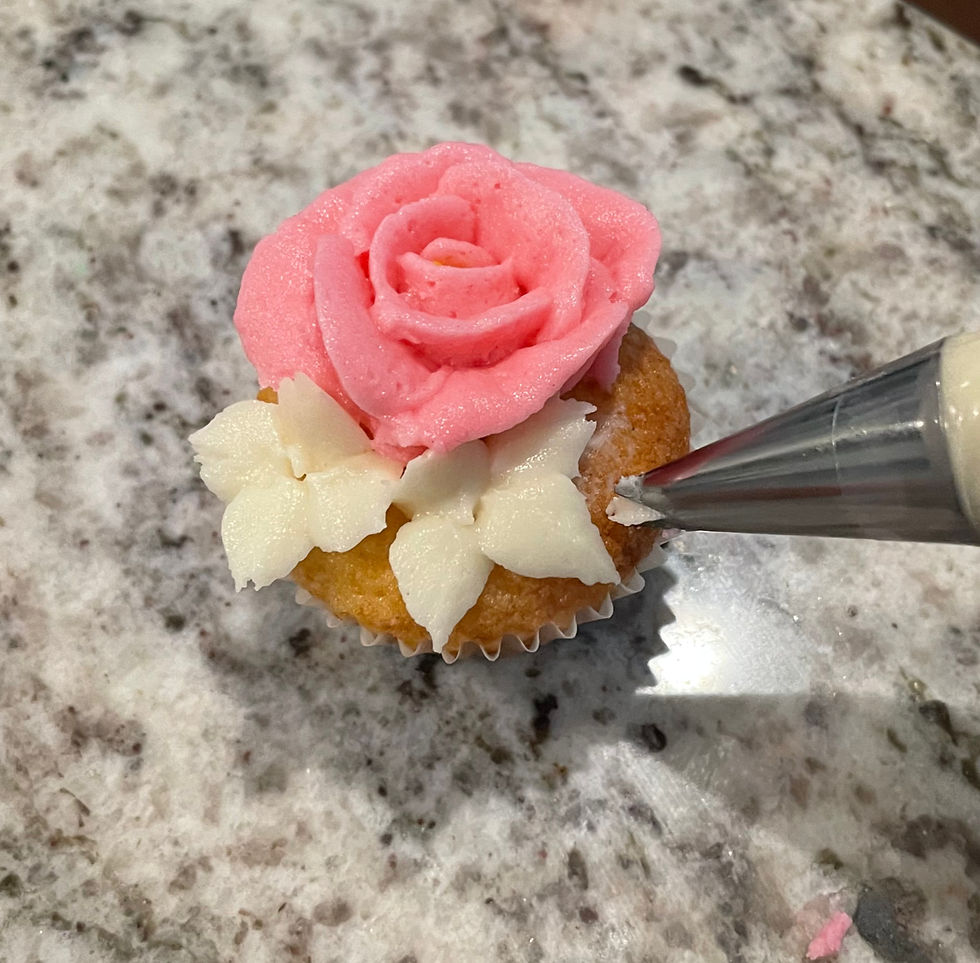
Combinations
You can also combine different flower types onto one cupcake! You can do any sort of combination that you want. If you are going to combine flowers, I recommend piping your biggest flower first (usually a rose) and the smaller flowers last. The leaves should usually be piped last (unless you want your flower to be sitting on a bed of leaves). The leaves can be piped in any remaining space in between the flowers. Now you are ready to make your own buttercream flowers!
ความคิดเห็น